Introduction: Why Water Damage Is Never a Small Problem
Water is patient. It seeps into wall cavities, travels along joists, hides beneath flooring, and silently destroys the structural integrity of your home — often long before you notice a single stain on the ceiling.
In the United States alone, water damage is one of the most common and costly home insurance claims filed each year. The average residential water damage claim runs into the thousands of dollars, and that’s when it’s caught early. When it’s left untreated — or improperly repaired — the costs can escalate dramatically, with mold remediation, structural repairs, and health consequences compounding the original problem.
Whether you’re dealing with a burst pipe in January, a roof leak after a storm, a flooded basement, or a slow appliance leak that went unnoticed for months, understanding what water damage repair actually involves can make the difference between a manageable restoration and a financial disaster.
This guide walks you through everything — the causes, the warning signs, the step-by-step restoration process, what it costs, how insurance works, and what you can do yourself versus when you absolutely need a professional.
What Is Water Damage Repair?
Water damage repair — also called water damage restoration — is the comprehensive process of assessing, mitigating, and repairing property damage caused by unwanted water intrusion.
It’s not just mopping up a puddle. True water damage restoration involves:
- Water extraction using industrial-grade pumps and vacuums
- Structural drying with high-capacity air movers and dehumidifiers
- Moisture mapping to find hidden water in walls, floors, and ceilings
- Antimicrobial treatments to prevent mold and bacterial growth
- Material removal of unsalvageable drywall, insulation, or flooring
- Full structural and cosmetic restoration to bring the property back to its pre-loss condition
The goal isn’t just to dry things out. It’s to ensure the property is safe, structurally sound, and free from secondary damage like mold — which can begin growing within 24 to 48 hours of water exposure.
Water damage restoration is governed by industry standards, most notably those set by the Institute of Inspection, Cleaning and Restoration Certification (IICRC), which classifies water damage by category (cleanliness of the water) and class (extent of absorption and drying difficulty).
Common Causes of Water Damage
Water damage doesn’t discriminate. It can happen in a brand-new home or a decades-old building, in any climate, at any time of year. Knowing the most common causes helps you stay vigilant — and catch problems before they become catastrophes.
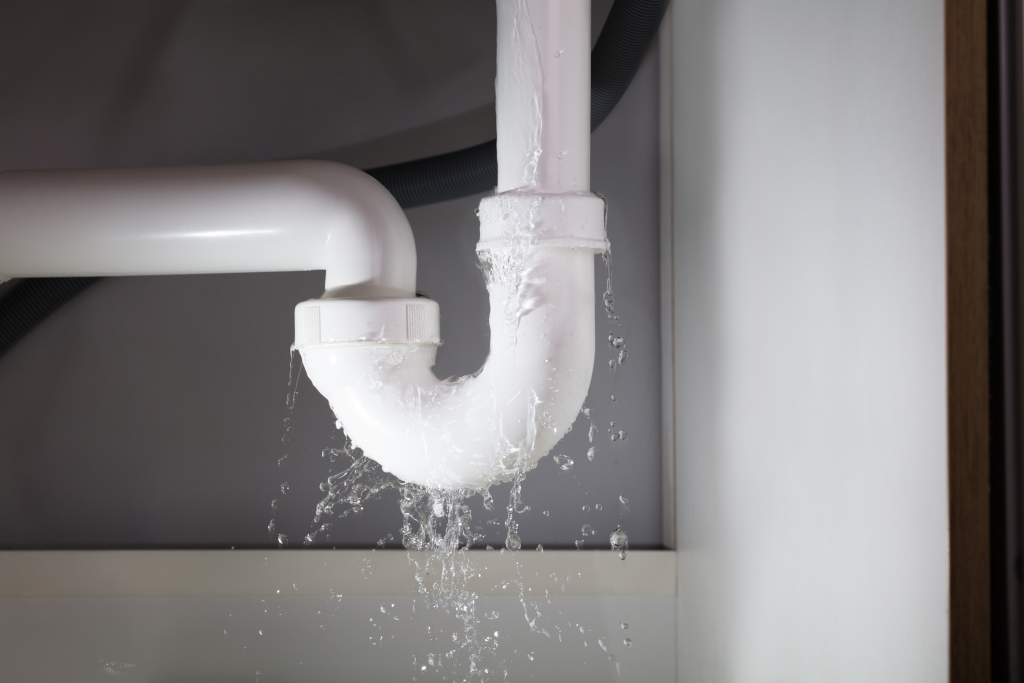
Burst and Frozen Pipes
Burst pipes are one of the most sudden and severe causes of water damage. During winter months, water inside pipes can freeze and expand, causing the pipe to crack or rupture entirely. When that frozen pipe thaws, it can release hundreds of gallons of water in a very short time.
Even without freezing, pipes under pressure can burst due to age, corrosion, or physical damage. A single burst pipe can flood multiple rooms within minutes.
Roof Leaks
A damaged or aging roof allows rainwater to penetrate the building envelope. What starts as a small drip in the attic can quickly spread along rafters and through insulation, eventually showing up as staining on ceilings or walls — sometimes far from the actual entry point.
Roof leaks often go unnoticed for extended periods, allowing moisture damage and mold to develop quietly behind finished surfaces.
Appliance Failures
Washing machines, dishwashers, refrigerators with ice makers, and water heaters are all common culprits. Supply line failures on washing machines, for example, are notorious for releasing large volumes of water quickly. A cracked or aging water heater tank can flood an entire basement.
Appliance-related water damage accounts for a substantial portion of residential insurance claims annually.
Plumbing Issues
Slow leaks from supply lines, drain connections, or plumbing fittings can cause significant moisture damage over time. Because these leaks often occur inside walls or under cabinets, the damage accumulates invisibly until mold growth or structural damage forces the issue into the open.
Flooding and Storm Surge
Natural flooding — whether from heavy rainfall, overflowing rivers, or storm surge — introduces large volumes of water rapidly. This type of flood damage is particularly problematic because floodwater is typically classified as Category 3 (black water), meaning it’s contaminated with sewage, chemicals, and biological material.
Basement flooding is especially common in areas with high water tables or inadequate drainage systems.
Sewage Backups
When municipal sewer systems become overwhelmed, or when a home’s sewer line becomes blocked, sewage can back up into lower-level drains. This is a serious health hazard and requires immediate professional water mitigation services. Sewage-contaminated water cannot be safely handled without proper protective equipment and professional remediation.
HVAC Leaks and Condensation
Air conditioning units, particularly central systems with indoor air handlers, can develop drain line clogs that cause water to overflow into ceilings, walls, or floors. Poorly insulated ductwork can also produce significant condensation. These are slow, ongoing sources of moisture that are frequently overlooked until secondary damage becomes apparent.
Signs You Need Water Damage Repair
Water damage isn’t always obvious. While a flooded basement announces itself immediately, many forms of moisture damage hide for weeks or months. Here are the warning signs every property owner should know.
Water Stains and Discoloration
Yellow, brown, or rust-colored stains on ceilings or walls are a classic indicator of water intrusion above or behind that surface. These stains often have irregular borders and may darken or grow after rain events or appliance use.
Mold Growth
Mold can appear as black, green, or white spots — sometimes fuzzy in texture. It often appears in corners, around windows, near baseboards, or on ceiling tiles. Visible mold is almost always a sign of persistent moisture, not a one-time event. If you see mold, there’s very likely water damage nearby.
Peeling or Bubbling Paint
When walls absorb moisture, the paint loses adhesion and begins to bubble, crack, or peel. This can happen on ceilings as well. While peeling paint alone can have other causes, combined with staining or musty odors, it strongly suggests underlying water damage.
Warped or Buckled Flooring
Hardwood floors that cup, crown, or separate at the seams have absorbed moisture. Vinyl or laminate flooring that lifts or bubbles is similarly affected. Carpet that feels spongy or develops an odor after apparent drying often has water-damaged padding or subfloor beneath it.
Musty or Earthy Odors
That persistent damp smell is one of the most reliable indicators of hidden moisture or active mold growth. Even if you can’t see damage, a musty odor in a basement, closet, or room warrants investigation. Don’t mask it with air freshener — find the source.
Structural Issues
Soft spots in flooring, sagging ceilings, bowing walls, or doors that no longer close properly can all indicate that water damage has compromised structural materials. Wood framing and subfloor material weaken significantly when repeatedly exposed to moisture.
Unexplained Increases in Water Bills
If your water usage hasn’t changed but your bill has spiked, a hidden plumbing leak is a likely culprit. Check your meter and monitor it over a few hours without using water. If it moves, you have an active leak.
The Water Damage Repair Process: Step by Step
Understanding how professional water damage restoration actually works helps you ask the right questions and know what to expect when you bring in a water restoration company.
Step 1: Inspection and Damage Assessment
Every restoration project begins with a thorough inspection. Certified technicians use moisture meters, thermal imaging cameras, and hygrometers to map the full extent of water intrusion — including areas that appear dry but contain elevated moisture levels.
The inspection determines the water category (clean, gray, or black water) and class (how deeply materials have absorbed moisture), which directly informs the restoration plan and equipment needed.
Step 2: Water Extraction
Removing standing water is the priority. Restoration teams deploy industrial truck-mounted or portable extraction units capable of removing hundreds of gallons rapidly. The faster water is removed, the less time it has to penetrate deeper into building materials.
For flooded basements, submersible pumps are often used first, followed by wet vacuums and extraction wands for residual water in carpet, flooring, and tight spaces.
Step 3: Structural Drying
Once bulk water is removed, the real work begins. Air movers (essentially high-powered directional fans) are positioned to maximize airflow across wet surfaces and create evaporation. This is not the same as pointing a box fan at a wet wall — professional air movers create targeted, high-velocity airflow patterns engineered to dry structural materials efficiently.
The drying process typically takes three to five days, though heavily saturated materials or large-scale flooding may extend this timeline.
Step 4: Dehumidification
As water evaporates from surfaces, it enters the air as humidity. Without aggressive dehumidification, that airborne moisture will simply re-deposit into other building materials — a phenomenon called secondary damage. Industrial dehumidifiers run continuously alongside air movers to pull moisture from the air and dramatically accelerate drying.
Technicians monitor humidity levels daily and adjust equipment placement to ensure consistent progress.
Step 5: Cleaning and Sanitization
Water damage — especially from gray or black water sources — introduces contaminants, bacteria, and the conditions for mold growth. Affected surfaces are cleaned with antimicrobial agents, and contents are treated or documented for replacement.
Odor treatment is also performed at this stage, using techniques like thermal fogging, hydroxyl generation, or ozone treatment to neutralize odors rather than simply covering them.
Step 6: Material Removal and Demolition
Sometimes drying in place isn’t possible. Saturated insulation, drywall, and flooring materials that cannot be adequately dried — or that have been compromised by black water contamination or mold — must be removed and replaced.
This controlled demolition, sometimes called “flood cuts,” involves cutting drywall to a specific height to expose wall cavities for drying and inspection. It sounds dramatic, but it’s often necessary for a complete, lasting restoration.
Step 7: Restoration and Final Repairs
Once the structure is dry and clean, restoration begins. This phase involves replacing removed materials, repainting, reinstalling flooring, and returning the property to its pre-loss condition. Depending on the scope of damage, this can range from a few repairs to a full room rebuild.
Water Damage Repair Cost: What to Expect
One of the first questions most homeowners ask is, simply: what’s this going to cost? The honest answer is that it depends on several factors — but here are realistic ranges to help you plan.
Factors That Affect Cost
Severity and Class of Damage Minor surface damage (Class 1) costs far less than deeply saturated structural materials (Class 3 or 4). The more material that needs to be removed and replaced, the higher the cost.
Water Category Clean water damage from a broken supply line is less expensive to remediate than gray water (from a dishwasher overflow) or black water (sewage or floodwater), which requires full decontamination and protective handling.
Property Size and Affected Area Cost scales with the square footage affected. A flooded bathroom costs less to restore than a flooded basement that spans the full footprint of a home.
Materials Affected Hardwood flooring, custom cabinetry, and plaster walls cost more to restore or replace than standard drywall and vinyl flooring. Material type significantly impacts both the drying complexity and the replacement cost.
Emergency Response and Time of Day After-hours or weekend emergency callouts typically carry premium pricing. However, delaying professional response to save money almost always results in higher total costs due to accelerated damage and mold growth.
Typical Cost Ranges
| Scope of Damage | Estimated Cost Range |
|---|---|
| Minor damage (single room, clean water) | $500 – $1,500 |
| Moderate damage (multiple rooms) | $1,500 – $5,000 |
| Significant damage (structural involvement) | $5,000 – $15,000 |
| Severe damage (flooding, major rebuild) | $15,000 – $50,000+ |
| Basement flood restoration | $2,500 – $10,000+ |
| Ceiling water damage repair | $500 – $2,500 |
| Mold remediation (if required) | $1,500 – $9,000 |
These figures represent typical ranges across the United States and will vary by region, contractor, and specific conditions. Always get multiple quotes, and be wary of unusually low estimates that don’t account for hidden damage.
Does Insurance Cover Water Damage Repair?
Insurance coverage for water damage is one of the most misunderstood aspects of home ownership. The short answer: it depends on the source and circumstances of the damage.
What Standard Homeowners Insurance Typically Covers
Most standard homeowners insurance policies cover “sudden and accidental” water damage. This typically includes:
- Burst pipes (when not caused by neglect)
- Appliance failures (washing machine overflows, dishwasher malfunctions)
- Roof leaks caused by a covered peril (like a storm or hail)
- HVAC-related water damage
- Accidental discharge from plumbing fixtures
The key word is “sudden.” If damage was the result of a slow leak that went unaddressed, insurers may argue negligence and deny the claim.
What Is Typically NOT Covered
- Flood damage from external sources (rivers, storm surge, heavy rain) — this requires separate flood insurance, typically through the National Flood Insurance Program (NFIP) or a private insurer
- Sewage backups — unless you have a specific sewer backup rider added to your policy
- Gradual leaks and long-term moisture damage attributed to maintenance neglect
- Groundwater seepage into basements
Filing a Water Damage Insurance Claim: Tips
Document everything before cleanup begins. Photograph and video the damage thoroughly. Don’t move or discard anything until your adjuster has assessed the loss — or at minimum until you’ve documented it completely.
Call your insurer promptly. Most policies require “timely” reporting. What counts as timely varies, but waiting weeks to report damage can give insurers grounds to question the claim.
Get a professional assessment. A certified restoration company can provide documentation that supports your claim, including moisture readings, scope of work, and before/after records.
Understand your deductible. For smaller claims, your out-of-pocket costs after the deductible may be modest. Weigh this against potential premium increases before filing on minor damage.
Request a public adjuster if needed. If your claim is complex or your insurer is undervaluing the damage, a licensed public adjuster works on your behalf (for a percentage of the settlement) to ensure you receive fair compensation.
DIY vs Professional Water Damage Repair
The instinct to handle things yourself is understandable. But with water damage, the risks of a DIY approach are significant — and the errors are often invisible until they’ve become much larger problems.
When DIY Makes Sense
Very minor, surface-level water damage may be manageable without professional help. If a small appliance leak is caught within hours, the affected area is small, and there’s no concern about water reaching structural materials, you may be able to dry and clean the area yourself.
Appropriate DIY scenarios include:
- Small spills on hard flooring cleaned up immediately
- A minor roof drip that saturated one ceiling tile (after fixing the leak source)
- Surface dampness on a concrete floor that dries quickly
When You Must Call a Professional
Any flooding involving more than a few inches of standing water requires professional extraction and drying equipment. Consumer fans and dehumidifiers simply cannot move enough air and remove enough moisture to prevent secondary damage in these situations.
Sewage or floodwater contamination always requires professional water mitigation services. The health risks of exposure to Category 3 water are serious, and improper cleanup can create lasting contamination issues.
Any situation where water may have penetrated walls, subfloors, or ceilings warrants professional assessment. Hidden moisture is the primary driver of mold growth and structural degradation — and you can’t detect it without proper equipment.
Mold is already visible. If you can see mold, the moisture problem is likely more extensive than the surface suggests, and remediation requires containment protocols to prevent spreading spores during cleanup.
The Hidden Cost of DIY Mistakes
The most expensive water damage scenarios are often the ones that were partially addressed and then assumed to be resolved. A homeowner who dries the visible surface but misses moisture inside the wall cavity will be dealing with a mold remediation project in 30 to 60 days — at costs that far exceed what a proper professional restoration would have run.
Emergency Water Damage Repair: Immediate Steps to Take
The first few hours after a water damage event are critical. Here’s what to do before help arrives.
1. Stop the water source, if possible. Shut off the water supply to the affected area or to the entire home. If the source is a burst pipe, know where your main shutoff valve is before an emergency happens.
2. Turn off electricity to affected areas. If there’s any possibility water has reached electrical outlets, panels, or wiring, shut off the breaker to that area. Never enter a standing-water situation without confirming the electricity is off.
3. Document everything. Before moving anything, photograph and video the damage from multiple angles. This documentation is essential for insurance claims.
4. Call a water damage restoration company immediately. Many companies offer 24/7 emergency response. The sooner professional drying equipment is deployed, the less secondary damage you’ll face. Time matters more than almost any other factor.
5. Move valuables and furniture if it’s safe to do so. If you can safely remove furniture, electronics, and important documents from the water-affected area without risk of electrical shock or contamination exposure, do so.
6. Do not use standard household fans to “dry” structural materials. This can actually spread mold spores if mold is present and rarely moves enough air to properly dry structural materials. Wait for professional equipment.
7. Do not enter sewage or floodwater without protection. If the water is contaminated, treat it as a hazmat situation. Proper PPE (gloves, boots, respiratory protection) is required.
How to Prevent Water Damage
Prevention is always cheaper than restoration. These practical strategies can dramatically reduce your risk of experiencing water damage.
Inspect and maintain your roof annually. Look for missing shingles, damaged flashing around chimneys and vents, and clogged gutters. A well-maintained roof is your first line of defense against storm-related water intrusion.
Know where your main water shutoff is. Every member of your household should know where it is and how to operate it. In an emergency, seconds matter.
Replace aging appliance supply lines. Rubber washing machine hoses have a lifespan of three to five years. Replace them proactively with braided stainless steel lines. Check the supply lines on your refrigerator, dishwasher, and ice maker as well.
Install water leak detectors. Inexpensive sensors placed under sinks, behind toilets, and near water heaters can alert you to leaks via a smartphone app before they become floods.
Maintain your sewer lines. Have older clay or cast iron sewer lines inspected and cleaned periodically. Tree root intrusion is a common cause of backups.
Insulate exposed pipes in cold climates. Pipes in unheated spaces — garages, crawlspaces, exterior walls — are vulnerable to freezing. Pipe insulation is one of the cheapest, most effective preventive measures available.
Keep your gutters and downspouts clear. Clogged gutters allow water to pool against your foundation and fascia, creating multiple entry points for water intrusion. Extend downspouts at least six feet from your foundation.
Grade your property away from the foundation. The ground immediately around your home should slope away from the foundation, directing rainwater and snowmelt away rather than toward the structure.
Check your water pressure. Excessively high water pressure (above 80 PSI) stresses pipes and fittings, increasing the risk of failure. Install a pressure regulator if needed.
Schedule annual plumbing inspections. A licensed plumber can identify slow leaks, corrosion, and aging fittings before they fail. It’s an investment that frequently pays for itself.
How to Choose a Water Damage Repair Company
Not all restoration companies are equal. When you’re dealing with an emergency, you may not have time to vet every option thoroughly — but these criteria will help you make a sound choice.
Look for IICRC Certification
The Institute of Inspection, Cleaning and Restoration Certification sets the professional standards for the water damage restoration industry. Look for companies with technicians certified in Water Damage Restoration (WRT) and Applied Structural Drying (ASD). This certification signals real training and adherence to industry best practices.
Verify Licensing and Insurance
A legitimate restoration company should be properly licensed in your state and carry both general liability insurance and workers’ compensation coverage. Don’t let unlicensed workers into your home — if something goes wrong, you could be liable.
Prioritize 24/7 Emergency Response
Water damage doesn’t wait for business hours. The best water restoration companies offer genuine around-the-clock emergency response with rapid deployment, typically within one to two hours of your call.
Check Reviews and References
Look for reviews on Google, the Better Business Bureau, and Yelp. Pay attention to how the company responds to negative reviews — that tells you as much as the reviews themselves. Ask for references from past clients, particularly on projects similar to yours in scope.
Demand Transparency in Pricing
Get a written scope of work and estimate before signing anything. Reputable companies will walk you through what needs to be done and why. Be cautious of contractors who won’t provide written estimates or who pressure you to sign before you’ve had time to review.
Ask About Direct Insurance Billing
Many established restoration companies work directly with insurance carriers and can bill your insurer directly, simplifying the claims process. Ask upfront whether they have experience working with your specific insurer.
Common Mistakes Homeowners Make With Water Damage
Even well-intentioned homeowners often make these costly errors. Learn from them so you don’t have to.
Waiting too long to act. This is the most common and expensive mistake. Every hour of delay allows water to migrate further and mold to gain a foothold. Mold can begin growing within 24 to 48 hours on wet organic materials.
Assuming things are dry because they look dry. Drywall, wood framing, and insulation can appear dry on the surface while remaining saturated inside. Without moisture meters, you’re guessing — and getting it wrong leads to hidden mold.
Turning on heating and AC before professional assessment. Running your HVAC system in a water-damaged space can spread contaminants and mold spores throughout the entire ductwork system.
Removing and discarding damaged materials before documentation. Insurance adjusters need to see the damage. Disposing of materials before documentation could jeopardize your claim.
Hiring the lowest bidder without vetting credentials. Restoration work done improperly often costs significantly more to fix than if it had been done right the first time. Value and price are not the same thing.
Using bleach as a mold solution. Bleach kills surface mold on non-porous materials but does not penetrate to kill mold in drywall, wood, or insulation. It also doesn’t address the moisture source, which means mold will return.
Ignoring small leaks. That slow drip under the sink, the occasional wet spot near the dishwasher, the hairline crack in the basement wall — these are not minor inconveniences. They are active moisture problems that are damaging your home right now.
Benefits of Professional Water Damage Restoration
Choosing professional water damage repair services isn’t just about having the right equipment. It’s about expertise, accountability, and long-term outcomes.
Faster, more complete drying. Professional-grade air movers and dehumidifiers dry structural materials significantly faster and more thoroughly than consumer equipment — reducing the window for mold growth.
Moisture mapping and documentation. Professionals document moisture readings at multiple points throughout the drying process, creating a record that proves the work was done properly. This matters for insurance and for peace of mind.
Mold prevention built into the process. IICRC-certified technicians apply antimicrobial treatments as a standard part of the restoration process, not as an afterthought.
Insurance expertise. Experienced restoration companies understand how to document work for insurance claims and can often advocate on your behalf for a fair settlement.
Warranties and accountability. Reputable companies stand behind their work. If a problem arises after restoration — say, a musty odor returns — they’ll come back and address it.
Health and safety protection. Professional teams have the training and equipment to handle contaminated water safely, protecting both you and their technicians from exposure to harmful pathogens and chemicals.
Frequently Asked Questions
What is water damage repair?
Water damage repair is the process of removing water from a property, drying structural materials, preventing mold growth, and restoring the property to its pre-damage condition. It encompasses water extraction, structural drying, cleaning, sanitization, material removal where necessary, and full reconstruction.
How much does water damage repair cost?
Costs range from around $500 for minor, localized damage to $50,000 or more for severe flooding or structural damage. The average residential water damage repair falls between $2,000 and $8,000. Factors affecting cost include the water source category, extent of saturation, property size, and materials affected.
Can water damage be repaired completely?
Yes — when addressed promptly and professionally, water damage can be fully repaired with no long-term consequences. The key is speed. Damage that is caught early and properly dried causes far less secondary damage than damage that sits untreated for days or weeks.
How long does water damage restoration take?
The drying phase typically takes three to five days. Total restoration — including material replacement and reconstruction — can take one to several weeks depending on the scope of damage. Your restoration company should be able to give you a timeline after the initial assessment.
Does homeowners insurance cover water damage?
Standard homeowners insurance covers sudden and accidental water damage from internal sources, like burst pipes or appliance failures. It does not cover flood damage from external sources, which requires separate flood insurance. Sewage backup coverage is typically a separate rider. Gradual leaks are often excluded on grounds of maintenance neglect.
Can I repair water damage myself?
Very minor, surface-level damage caught immediately may be manageable as a DIY project. However, any situation involving standing water, potential structural saturation, contaminated water, or visible mold requires professional water mitigation services. The risks of DIY in these scenarios — particularly hidden mold — are not worth the cost savings.
What happens if water damage is left untreated?
Untreated water damage leads to mold growth (beginning within 24 to 48 hours), structural deterioration of wood framing and subfloor materials, weakening of drywall and insulation, electrical hazards, and significant health risks from mold and bacterial exposure. Long-term structural damage can make a property unsafe and dramatically reduce its value.
How do professionals repair water damage?
Professionals follow a structured process: inspection and moisture mapping, water extraction, structural drying with air movers and dehumidifiers, antimicrobial treatment, removal of unsalvageable materials, and full reconstruction. The process is guided by IICRC standards and monitored daily using calibrated moisture measurement equipment.
Conclusion: Don’t Let Water Win
Water damage is one of those problems that rewards urgency and punishes hesitation. The homeowner who calls a water restoration company within the first few hours of a burst pipe typically deals with a few thousand dollars of restoration work. The one who waits, or who tries to handle it with towels and a fan, often ends up with a mold problem, structural damage, and a bill that’s five to ten times higher.
If you’re reading this because water damage is happening right now — stop, document it, shut off the water source if safe to do so, and call a certified water damage restoration professional immediately. Every hour matters.
If you’re reading this to prepare yourself, you’re already ahead. Know where your shutoffs are, inspect your appliances and roof regularly, install leak detectors, and understand your insurance coverage before you need it.
Water damage repair is not the end of the world. With the right professional help and the right response time, most properties are fully restored with no lasting evidence of the event. What makes the difference is the decision you make in those first critical hours.